Method 1: phpMyAdmin
- Download phpMyAdmin.
- Unzip the downloaded folder into the directory where you store your other Homestead sites, e.g., "C:/code/".
- Rename the folder to "phpmyadmin".
- Map the folder in your
homestead.yamlfile:folders: - map: "C:/code/phpmyadmin" to: /home/vagrant/code/phpmyadmin sites: - map: phpmyadmin.test to: /home/vagrant/code/phpmyadmin - Add the new site to your Windows hosts file:
Tip: You can find the IP for your virtual machine in your192.168.56.56 phpmyadmin.testhomestead.yamlfile. - Now, from the terminal, start or restart your virtual machine and re-provision it to update the Nginx configuration:
orvagrant up --provisionvagrant reload --provision
Method 2: MySQL Workbench
- Download and install MySQL Workbench.
- Launch MySQL Workbench and click the "Setup new connection" button.
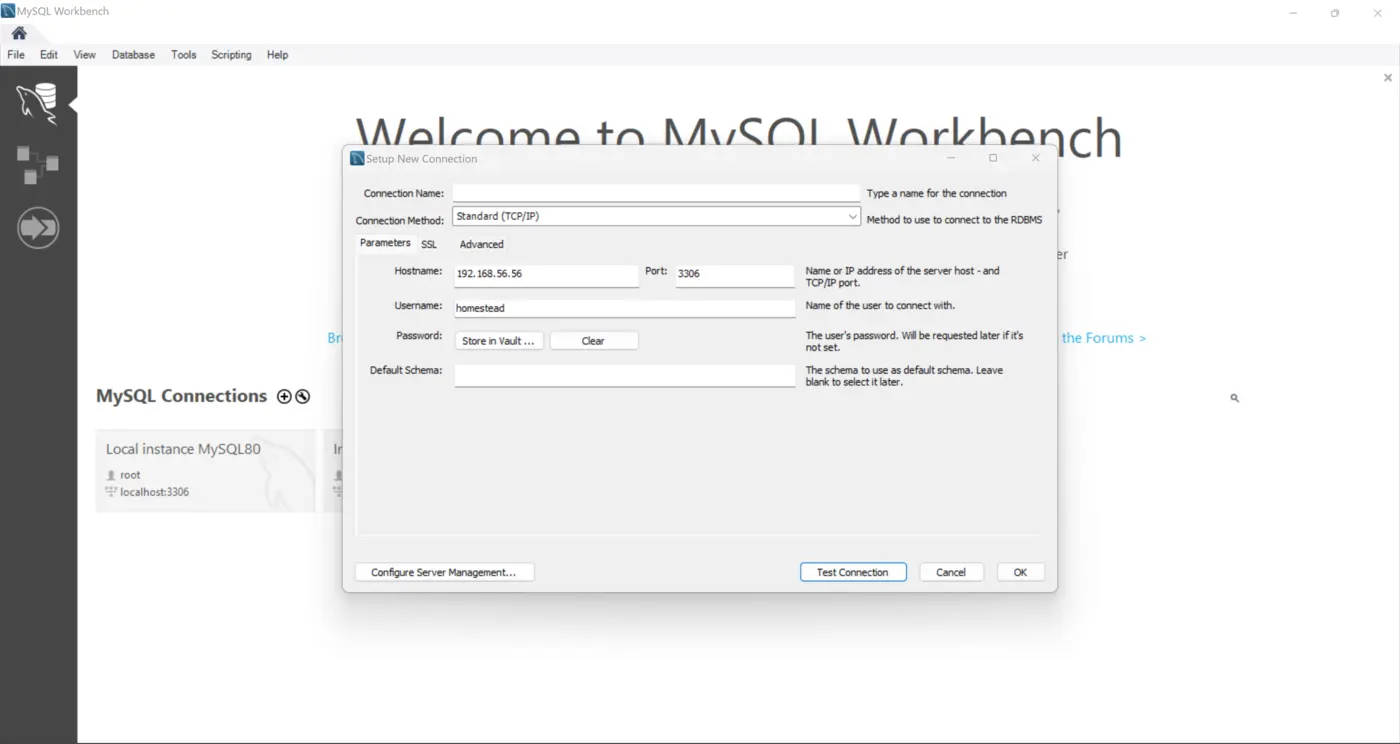
- Configure the connection as shown in the screenshot below:

-
- The password should be set to "secret".
- Click "Test Connection" to verify that everything is set up correctly.
- Provide "homestead" as the connection name and click "Ok" to save the configuration for quick access in the future.